Ranged Yardımcısı
Introduction
Ranged is a skill you can use to fight monsters and other people. It allows you to attack from a distance with a bow and arrow typically, although there are many different weapons you can use which are explained later in this guide. It is an easy skill to get into and can be used in many situations - especially in fights and wars in the wilderness.
 |
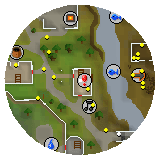
If you are just starting out in Ranged you may want to pay a visit to Roddeck the Advisor in the building east of the Lumbridge General Store to learn about the different kinds of bows, arrows and armour as well as various other tips. You can also safely train your Ranged level by shooting arrows at the targets in the nearby building, although you only receive approximately 0.1xp per arrow. You are unable to shoot at the targets after you reach the Ranged level of 10. You can get a free bow and free arrows from Lowe’s Archery Emporium in Varrock. |
Basics
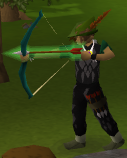
To start off, you can use the basic bow and arrow. You will need to wield your bow as your weapon by clicking on it in your inventory, and then click on your arrows to hold them in your quiver. You will see your character now ready for action. Just like normal fighting, to start attacking you simply select attack on the monster you want to start ranging. You will see your character start taking arrows from his/her quiver and shooting at the enemy.
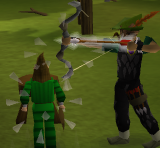
You can either attack up close or you can use an obstacle to stop the monster from reaching you. This is a useful tactic to avoid damage and can be seen in the picture below. However, be aware that some monsters have their own ranged weapons and will attack you from a distance as well. An important point is that some of your arrows fall next to the monster and you can pick them up to use them again. However some are damaged and are not recoverable; approximately four fifths of arrows fired are recoverable. The better the metal of your arrow, the more you will recover as they are less easily damaged.

Experience points you receive towards your ranged skill depend on which of the three attacking styles you are using, shown below. With Accurate or Rapid styles, for each damage point you inflict you will receive .4 ranged xp and .133xp Constitution xp. However for Longrange, you will receive .2 ranged xp, .2 defence xp points and .133 Constitution xp. It is up to you the style you want to train with, however it is generally accepted that you get the fastest xp by using the Rapid style. A quick example is that if you hit a 120 on a Hill giant using the accurate style, you would receive 48 ranged xp and 16 hits xp.

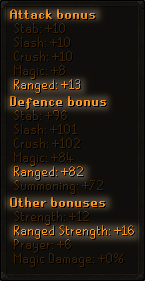
It is worth noting that a shortbow fires arrows faster than a longbow. How often you inflict damage depends on the value of your ranged attack of your equipment and the ranged defence of your opponent. This also applies in the reverse situation; how much you get hit depends on the value of your ranged defence and the ranged attack of your opponent. How much damage you inflict depends on the value of your ranged strength - the Ranged skill's version of strength bonus.
Your ranged attack increases by wielding a better bow or wearing special leather armour as described below. Ranged defence works in the same way. Ranged strength increases with higher-quality ammunition. For example, scorpions naturally have good solid body armour which would be hard to hit through. How hard you hit increases with a higher ranged level and a higher ranged strength. A higher ranged attack only affects how often you hit.
Weapons
Bows and Arrows
Crossbows and Bolts
Hunter Weapons
Additional Weapons
Obtaining Equipment and Ammo
Weapon Poisons
Special Weapons
Bows and Arrows
There are different types of bows which give different ranged attack boosts; you need to have a higher ranged level to wield the better ones. Free players can only wield up to Maple bows. The Magic Longbow and the Magic Shortbow also have the advantage of having special attacks. The special attack for the Magic Longbow has a 35% drain rate and shoots an arrow with a chance to hit higher than normal. The Magic Shortbow's special shoots two arrows extremely fast and has a 55% drain rate.
 |
Shortbow |
Any |
+8 |
 |
Longbow |
Any |
+8 |
 |
Oak Shortbow |
5 |
+14 |
 |
Oak Longbow |
5 |
+14 |
 |
Willow Shortbow |
20 |
+20 |
 |
Willow Longbow |
20 |
+20 |
 |
Willow Composite Bow |
20 |
+22 |
 |
Maple Shortbow |
30 |
+29 |
 |
Maple Longbow |
30 |
+29 |
 |
Yew Shortbow |
40 |
+47 |
 |
Yew Longbow |
40 |
+47 |
 |
Yew Composite Bow |
40 |
+49 |
 |
Magic Shortbow
(special attack) |
50 |
+69 |
 |
Magic Longbow
(special attack) |
50 |
+69 |
 |
Magic Composite Bow
(special attack) |
50 |
+71 |
You can use your bow with different types of arrows. The better the arrow - the higher you can hit, and the better the bow you need to be wielding so that you can fire it. Free players can use all normal arrows up to and including Adamant.
Crossbows and Bolts
An alternative to regular bows and arrows are crossbows and bolts. The advantage here is that you can also wield a shield. Free players can only use the normal and phoenix crossbow which both fire bronze bolts. Members can also use crossbows and bolts made from any metal up to rune. These may be made by using the Fletching and Smithing skills, or purchased from crossbow shops: Hirko in Keldagrim, Holoy under White Wolf Mountain, and Hura in the Dwarven Mines. Crossbows are more accurate than the equivalent bows, so they will hit fewer zeros. However, it can be used with a shield and when it hits, its bolts can hit higher than the corresponding arrows. Moreover, gem-tipped bolts can be enchanted for increased damage in the form of a special attack (see the Magic guide for more details). A final feature of crossbows is the Mithril grapple, which can be used for numerous Agility shortcuts. Read more about it in the Agility Guide.
The table below lists the various existing crossbows, their characteristics and the type of bolts that they can fire. For more details on bolts, and how to make members' crossbows, please check the Fletching guide.
 |
Crossbow |
1 |
+6 |
Bronze |
 |
Phoenix Crossbow |
1 |
+6 |
Bronze |
 |
Bronze Crossbow |
1 |
+18 |
Bronze |
 |
Blurite Crossbow* |
16 |
+30 |
Up to Blurite |
 |
Iron Crossbow |
26 |
+42 |
Up to Iron |
 |
Dorgeshuun Crossbow |
28 |
+42 |
Bone, metal (up to Iron) without gem tips |
 |
Steel Crossbow |
31 |
+54 |
Up to Steel |
 |
Black Crossbow |
33 |
+60 |
Up to Black |
 |
Mithril Crossbow |
36 |
+66 |
Up to Mithril |
 |
Adamantite Crossbow |
46 |
+78 |
Up to Adamantite |
 |
Runite Crossbow |
61 |
+90 |
Up to Runite |
 |
Chaotic crossbow** |
80 |
+120 |
Up to Runite |
*In order to use a Blurite crossbow (untradeable) you must have completed The Knight's Sword quest.
**Also requires 80 Dungeoneering. For more information check the item's database entry.
 |
Bronze Bolts |
10 |
 |
Iron Bolts |
46 |
 |
Steel Bolts |
64 |
 |
Mithril Bolts |
82 |
 |
Adamant Bolts |
100 |
 |
Rune Bolts |
115 |
Using a crossbow you can shoot enchanted crossbow bolts (see the Fletching guide for making them and the Ranging guide for using them.) Firing an enchanted bolt has a chance of having a particular effect on the enemy, listed in the table below.
| Bronze with Opal tips |
Lucky Lightning |
Can cause a lightning bolt to hit your opponent inflicting damage. |
14 |
| Blurite with Jade tips |
Earth's Fury |
Can cause your opponent to be knocked down, stunning them. |
30 |
| Iron with Pearl tips |
Sea Curse |
Causes water to fall on your opponent, inflicting damage. Water staves prevent this, fire opponents are vulnerable to it. |
48 |
| Steel with Red Topaz tips |
Down to Earth |
Can lower your opponents magic level. Only works on human controlled players. |
66 |
| Mithril with Sapphire tips |
Clear Mind |
Can lower your opponents Prayer points and give them to you. Only works on human controlled players. |
83 |
| Mithril with Emerald tips |
Magical Poison |
Bolts are super poisoned, with greater chance of poisoning than using a potion. |
85 |
| Adamantite with Ruby tips |
Blood Forfeit |
Can cause opponent to lose 20% of their life points. In return, you lose 10% of yours. |
103 |
| Adamantite with Diamond tips |
Armour Piercing |
Can ignore a part of your opponent's Ranged Defence. |
105 |
| Runite with Dragonstone tips |
Dragon's Breath |
Can hit with the power of dragon breath. Power is lost when fighting someone with a anti-dragonbreath shield or a monster that can use fire breath. |
117 |
| Runite with Onyx tips |
Life Leech |
Can inflict extra damage to the opponent. A portion of this extra damage heals the shooter of the bolt. |
120 |
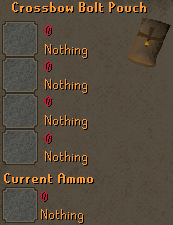
Worried that you will not have space to store all the bolts you plan to use? The Crossbow Bolt Pouch can be used to store up to 255 of 4 different types of bolts apart from the bolts you currently have equipped. Speak to Hirko the Crossbow salesman in the eastern market building in Keldagrim to purchase one for 1500 gp.
Hunter Weapons
With the creation of the Hunter skill, a number of new ranged weapons were introduced into the game. Including the first grenades and flamethrowers, these new weapons are quite unique, and very powerful.
Chinchompas are volatile little creatures - should you kill them, they will explode. However, when captured by use of box traps, their explosive characteristics make them a perfect weapon. When attacking, you will have the choice of short, medium, or long fuse. Use a fuse length that matches the distance to your enemy: if he's very close, you'll want a short fuse so it will immediately blow, if he's far away, you don't want the chinchompa to blow up before it hits!
 |
Chinchompa |
45 |
+45 |
 |
Red Chinchompa |
55 |
+70 |
An experienced hunter and inventor named Leon resides in the Hunter store in Yanille. He is willing to sell one of his newer creations, the Hunters' Crossbow, for 1,300 gp. This crossbow is limited to using bolts fashioned from the spikes of kebbits. Catching prickly kebbits with deadfall traps will give you Kebbit spikes, used to make Kebbit bolts, while tracking Razor-back kebbits give you Long kebbit spikes, which are used for Long kebbit bolts. These bolts must be fletched using a chisel - if you do not have a sufficient fletching level to do so, Leon will fletch them for a small fee.
 |
Hunters Crossbow |
50 |
+55 |
Kebbit bolts and Long kebbit bolts |
Additional Weapons
Slings are ranged weapons intended for use by beginner players which do not use any form of ammunition. The basic slings can be found as random drops by monsters in the Lumbridge Catacombs, and Kayle's sling is received during the quest The Blood Pact.
 |
Sling |
+4 |
6 |
 |
Kayle's sling |
+5 |
6.5 |
Below is a list of unusual ranged weapons that can be smithed easily - these are MEMBERS ONLY. Darts can be smithed after completing the Tourist Trap Quest. You smith 10 dart tips per bar and attach feathers. Darts are stackable. Throwing Knives are smithed 5 per bar and are also stackable. They cannot shoot as far as if you were using a bow. However, like crossbows, a shield can be wielded while using these weapons.
 |
Bronze Darts |
+3 |
1 |
 |
Bronze Knife |
+4 |
3 |
 |
Iron Darts |
+4 |
3 |
 |
Iron Knife |
+5 |
4 |
 |
Steel Darts |
+5 |
4 |
 |
Steel Knife |
+8 |
7 |
 |
Black Darts |
+7 |
6 |
 |
Black Knife |
+10 |
8 |
 |
Mithril Darts |
+8 |
7 |
 |
Mithril Knife |
+11 |
10 |
 |
Adamant Darts |
+11 |
10 |
 |
Adamant Knife |
+15 |
14 |
 |
Rune Darts |
+15 |
14 |
 |
Rune Knife |
+25 |
24 |
 |
Dragon Darts |
+18 |
20 |
(No equivalent) |
There are even more unorthodox ranged weapons! A tribal man has set up an Authentic Throwing Weapons shop in the Ranged guild (members only), selling Javelins and Throwing Axes. They can both be wielded with shields and offer a versatile alternative to the norm.
 |
Bronze Javelins |
+5 |
6 |
 |
Iron Javelins |
+8 |
10 |
 |
Steel Javelins |
+12 |
12 |
 |
Mithril Javelins |
+17 |
18 |
 |
Adamant Javelins |
+24 |
28 |
 |
Rune Javelins |
+38 |
42 |
 |
Morrigan's Javelin (Special attack) |
+105 |
145 |
 |
Bronze Thrownaxe |
+4 |
5 |
 |
Iron Thrownaxe |
+5 |
7 |
 |
Steel Thrownaxe |
+8 |
11 |
 |
Mithril Thrownaxe |
+12 |
16 |
 |
Adamant Thrownaxe |
+17 |
23 |
 |
Rune Thrownaxe
(Special attack) |
+26 |
36 |
 |
Morrigan's Throwing Axe
(Special attack) |
+93 |
117 |
So there you have it, a wide selection of ranged weapons. Most people opt for the traditional bow and arrow as the bows give the highest bonus to your ranged attack. However Bolts, Darts and Javelins are also used but to a lesser extent. It is up to you to decide what to train with, but feel free to experiment.
Obtaining Equipment and Ammo
Free players can buy bows, arrows and bolts at Lowe's archery store in Varrock. There is also Brian's archery shop in Rimmington, just south of Falador.
Members can also buy from Hickton's archery emporium in Catherby, Gulluck and Sons weapons store in the Grand Tree. Members who've completed the Biohazard quest can make purchases at the Armoury in King Lathas' training camp. Members who've started Mourning's Ends part 1 quest can also buy from the Lletya Archery Shop. Level 40 rangers can shop at Dargaud's Bow and Arrows at the Ranged Guild southwest of Seers' Village.
Many monsters drop various kinds of arrows and bolts. Refer to our Bestiary to find them. Some also drop equipment hard to find elsewhere. Different kinds of bolts and arrows, in addition to equipment, can be obtained from Treasure Trail rewards; refer to our Treasure Trails Guide to learn more.
Most ranged ammunition and equipment can be smithed, crafted, or fletched. See the respective skill guides to find out how.
Weapons Poison
In addition to the above types, the Herblore skill allows Members to access another type of ammo - poisoned ammunition! There are three types of weapon poisons that can be used to poison your arrows, bolts, darts, javelins and knives; these are Weapon poison, Weapon poison(p+), and Weapon poison(p++). Poisoned arrows and ammunition, in addition to the regular damage they inflict, have a chance to poison your opponent, thereby dealing even more damage every few rounds of combat.
For more information on weapon poison and how to poison your weapons, please refer to the Herblore skill guide.
Special Weapons
There are a number of special weapons throughout the game, generally accessible only upon the completion of certain quests or the killing of high-level monsters. These weapons can either be utilized for certain circumstances, such as Chompy Hunting, or simply employed against enemies for their sheer power. They are listed below, with descriptions of their purpose and how to obtain them.
 |
Zaryte bow |
This bow requires level 80 Ranged to wield, providing a +120 ranged attack bonus. It is dropped only by Nex. It does not require any ammunition to use, but it will degrade and become useless after ten hours of combat. A degraded Zaryte bow may be repaired at an armour stand in a player-owned house, or by Bob in Lumbridge. |
 |
Dark bow |
This bow requires level 60 ranged to wield, providing a +95 ranged bonus. It is dropped only by Dark Beasts. Though it is very slow, it shoots two arrows each time. It is the only bow capable of shooting dragon arrows. Its special attack varies based on whether dragon arrows are used or not, becoming more powerful when they are. |
 |
Crystal bow |
This bow requires a ranged level of 70 and an agility level of 50 as well as finishing the quest Roving Elves to wield. It initially provides +100 ranged bonus when wielded. The properties of this bow are thoroughly detailed in the Crystal Bow section. |
 |
Seercull |
This bow can be obtained from killing King Dagannoths in the Waterbirth Island dungeon. It gives a range bonus of +69, like the magic short- and longbows, but it fires about the same speed as the crystal bow. Furthermore, its special attack reduces the magic level of the victim by the damage inflicted/10. (If 70 damage is done, the Magic level of the attacked temporarily drops 7). |
 |
Dorgeshuun crossbow |
This crossbow can be bought from the Cave Goblin weapon shop, Nardok's Bone Weapons. It requires a ranged level of 28 to use, and gives a +42 bonus to ranged attacks. Its special attack can only be used after completing the Death to the Dorgeshuun quest. It uses bone bolts and bare metal bolts (barbed tips allowed, gem tips not allowed) up to iron. |
 |
Ogre bow |
This can be obtained from Rantz in Ogre country, far south of Yanille. It will cost you 500-600gp and is primarily used to kill Chompy Birds. It provides a +38 ranged attack bonus when wielded, which is better than a Maple bow but less than a Yew bow. See our Chompy hunting guide for more information. |
 |
Ogre arrows |
Arrows used with the Ogre bow to kill chompys. Fletched using logs from an Achey Tree. See our Chompy hunting guide for more information. |
 |
Composite ogre bow |
Obtainable after completing the Zogre Flesh Eater quest and only works with Ogre and Brutal Arrows. See our Chompy hunting guide for more information. |
 |
Brutal arrows |
Arrows shot from Composite Ogre bow. See our Chompy hunting guide for more information. |
 |
TokTz-xil-ul |
A ranged weapon from the land of the TzHaar. Throw it at your enemies to let its +69 ranged attack bonus shred your opponents. |
 |
Zanik's crossbow |
This crossbow is obtainable during The Chosen Commander quest. It requires a ranged level of 48 to wield, has a range bonus of +78, and can fire up to adamant bolts. Its special attack can deal 150+ damage on players wearing god armour or using prayer and 30-150 extra damage to other players. |
 |
Hand cannon |
This is a two-handed weapon that fires special Hand cannon shots, with a whopping Ranged Strength bonus of +150. It also has a range attack bonus of +90, but there is a chance with each shot that this weapon will be destroyed. This is reduced with a higher firemaking level. Its special attack increases accuracy, but also increases the chance that the weapon will be destroyed. You must have completed the Forgiveness of a Chaos Dwarf quest to wield it. |
 |
Guthix bow |
This requires a ranged level of 55 to wield and provides +80 ranged bonus and +4 prayer bonus when wielded. When used in conjunction with Guthix arrows, it doubles the arrows' chance of dealing additional earth damage. The Guthix bow has a +4 Prayer bonus, a feature unique to the god bows. Its special attack drains 55% of the special attack bar, and deals 1.5x damage to your opponent. You then heal for 1x the damage you would have dealt. This healing is applied over a short period of time. This bow is acquired from Treasure Trails. |
 |
Saradomin bow |
This requires a ranged level of 55 to wield and provides +80 ranged bonus and +4 prayer bonus when wielded. When used in conjunction with Saradomin arrows, it doubles the arrows' chance of dealing additional water damage. The Saradomin bow has a +4 Prayer bonus, a feature unique to the god bows. Its special attack drains 55% of the special attack bar, deals damage and heals you for double the amount of damage dealt. This healing is applied over a short period of time. This bow is acquired from Treasure Trails. |
 |
Zamorak bow |
This requires a ranged level of 55 to wield and provides +80 ranged bonus and +4 prayer bonus when wielded. When used in conjunction with Zamorak arrows, it doubles the arrows' chance of dealing additional fire damage. The Zamorak bow has a +4 Prayer bonus, a feature unique to the god bows. Its special attack drains 55% of the special attack bar, and deals double damage to your opponent. This bow is acquired from Treasure Trails. |
 |
God arrows |
The ranged strength varies depending on your Ranged level. It ranges from +11 (level 1 Ranged) to +60 (level 70+ Ranged). These arrows will disappear once fired, and will not drop on the floor. They have a 1 in 10 chance of hitting for additional elemental damage (which increases to 1 in 5 if used with a God bow). Guthix arrows deal earth damage, Zamorak arrows deal fire damage, and Saradomin arrows deal water damage. These arrows are acquired from Treasure Trails. |
 |
Bane Arrows |
Bane arrows can only be made after the Ritual of the Mahjarrat quest, and deal additional damage against certain creatures. Bane ore is tuned to either Abyssal demons, Basilisks, Dragons or Wallasalki using the Tune Bane Ore spell before being smithed into arrowtips. The resulting arrows deal significantly higher damage than their ranged strength suggests, but only against the monster that they are tuned to. |
 |
Bane Bolts |
Bane bolts can only be made after the Ritual of the Mahjarrat quest, and deal additional damage against certain creatures. Bane ore is tuned to either Abyssal demons, Basilisks, Dragons or Wallasalki using the Tune Bane Ore spell before being smithed into unfinished bolts. The resulting bolts deal significantly higher damage than their range strength suggests but only against the monster that they are tuned to. |
 |
Zaryte Bow |
115 |
 |
Crystal Bow |
70 |
 |
Barbed Bolts |
12 |
 |
Bone Bolts |
49 |
 |
Broad-tipped bolts |
100 |
 |
Broad Arrows |
28 |
 |
Ogre Arrows |
22 |
 |
Bronze Brutal |
11 |
 |
Iron Brutal |
13 |
 |
Steel Brutal |
19 |
 |
Black Brutals |
22 |
 |
Mithril Brutal |
34 |
 |
Adamant Brutal |
45 |
 |
Rune Brutal |
60 |
 |
TokTz-Xi-Lul |
49 |
 |
Morrigan's Javelin |
145 |
 |
Morrigan's Throwing Axe |
117 |
 |
Hand Cannon Shot |
150 |
 |
God Arrows |
Varies |
 |
Bane Arrows |
Deals 22 additional damage, but only on the monster that they are tuned to. |
 |
Bane Bolts |
Deals 82 additional damage, but only on the monster that they are tuned to. |
Armour
Just like there are different types of armour for fighters, there is also a good selection of leather armour for rangers. Refer to the crafting guide for details on how to make them. They are presented below with details of their stats. Armour for rangers has to be made from leather as it allows the greatest flexibility of movement and is light enough not to weigh the ranger down. It also provides a good defence against mages especially, as well as other rangers, but makes you slightly vulnerable to regular warriors. Free players can wear all these types of armour (made from cow hide).
In addition to these leather armour pieces, players can wear amulets that give a range attack bonus. These amulets are the amulet of accuracy (+4 range attack) and other various amulets made using the Crafting skill. The regular leather items have no range or defence requirement to wear them but the other items have the following requirements:
- Hard Leather Body requires 10 Defence
- Coif and the Studded Chaps require 20 Range
- Studded Leather Body requires 20 Range and 20 Defence
 |
Cowl |
0 |
0 |
0 |
0 |
+1 |
+2 |
+3 |
+4 |
+2 |
+3 |
 |
Coif |
0 |
0 |
0 |
-1 |
+2 |
+4 |
+6 |
+8 |
+4 |
+4 |
 |
Leather Body |
0 |
0 |
0 |
-2 |
+2 |
+8 |
+9 |
+10 |
+4 |
+9 |
 |
Studded Leather Body |
0 |
0 |
0 |
-4 |
+8 |
+18 |
+25 |
+22 |
+8 |
+25 |
 |
Hard Leather Body |
0 |
0 |
0 |
-4 |
+8 |
+12 |
+15 |
+18 |
+6 |
+15 |
 |
Leather Chaps |
0 |
0 |
0 |
0 |
+4 |
+2 |
+3 |
+1 |
0 |
0 |
 |
Studded Leather Chaps |
0 |
0 |
0 |
-5 |
+6 |
+15 |
+16 |
+17 |
+6 |
+16 |
 |
Vambraces |
0 |
0 |
0 |
0 |
+4 |
+2 |
+2 |
+1 |
0 |
0 |
If you have access to the Dorgeshuun city of Dorgesh-Kaan, you can purchase this armour from Reldak's Leather Armour in the marketplace. This armour requires 25 Ranged and 25 Defence to wear.
 |
Frog-Leather Body |
0 |
0 |
0 |
-5 |
+10 |
+23 |
+26 |
+30 |
+15 |
+10 |
|
|
 |
Frog-Leather Chaps |
0 |
0 |
0 |
-5 |
+2 |
+7 |
+7 |
+9 |
+4 |
+9 |
|
|
 |
Frog-Leather Boots |
0 |
0 |
0 |
-8 |
+2 |
+1 |
+1 |
+1 |
0 |
+1 |
|
|
Another type of armour you can utilize is Spined Armour. This armour is constructed from the hides of Dagannoths by Sigli the Hunter near the entrance to Rellekka for a fee. It offers good protection and bonuses.
 |
Spined Helm |
0 |
-6 |
-6 |
-6 |
+6 |
+6 |
+6 |
+6 |
+6 |
0 |
0 |
0 |
 |
Spined Body |
0 |
0 |
0 |
-15 |
+15 |
+40 |
+32 |
+45 |
+20 |
+40 |
0 |
0 |
 |
Spined Chaps |
0 |
0 |
0 |
-10 |
+8 |
+22 |
+16 |
+24 |
+8 |
+22 |
0 |
0 |
 |
Spined Gloves |
0 |
0 |
0 |
0 |
0 |
+1 |
+2 |
0 |
0 |
0 |
0 |
0 |
 |
Spined Boots |
0 |
0 |
0 |
0 |
0 |
+1 |
+1 |
0 |
0 |
0 |
0 |
0 |
However, there is a better type of leather you can get by killing Dragons - Dragon hide. This can be crafted to make even more useful Dragon Leather Armour as shown below. Different dragons give different hides which in turn can be crafted into different leathers. Only the green variety is available for F2P players from Oziach and the Champions Guild, after they complete the Dragon Slayer quest. You can wear the chaps and vambraces even if you haven't completed the Dragon Slayer quest, though.
The requirement of 40 defence only applies to the body, you can wear the chaps and vambraces at 1 defence. The range requirement applies to all armour pieces.
- Green Leather Armour requires 40 ranged
- Blue Leather Armour requires 50 ranged (members only)
- Red Leather Armour requires 60 ranged (members only)
- Black Leather Armour requires 70 ranged (members only)
 |
Green Body |
0 |
0 |
0 |
-15 |
+15 |
+40 |
+32 |
+45 |
+20 |
+40 |
 |
 |
Green Chaps |
0 |
0 |
0 |
-10 |
+8 |
+22 |
+16 |
+24 |
+8 |
+22 |
 |
Green Vambraces |
0 |
0 |
0 |
-10 |
+8 |
+3 |
+2 |
+4 |
+2 |
0 |
 |
Blue Leather Body |
0 |
0 |
0 |
-15 |
+20 |
+45 |
+37 |
+50 |
+30 |
+45 |
 |
 |
Blue Leather Chaps |
0 |
0 |
0 |
-10 |
+11 |
+25 |
+19 |
+27 |
+14 |
+25 |
 |
Blue Leather Vambraces |
0 |
0 |
0 |
-10 |
+9 |
+4 |
+3 |
+5 |
+4 |
0 |
 |
Red Leather Body |
0 |
0 |
0 |
-15 |
+25 |
+50 |
+42 |
+55 |
+40 |
+50 |
 |
 |
Red Leather Chaps |
0 |
0 |
0 |
-10 |
+14 |
+28 |
+22 |
+30 |
+20 |
+28 |
 |
Red Leather Vambraces |
0 |
0 |
0 |
-10 |
+10 |
+5 |
+4 |
+6 |
+6 |
0 |
 |
Black Leather Body |
0 |
0 |
0 |
-15 |
+30 |
+55 |
+47 |
+60 |
+50 |
+55 |
 |
 |
Black Leather Chaps |
0 |
0 |
0 |
-10 |
+17 |
+31 |
+25 |
+33 |
+28 |
+31 |
 |
Black Leather Vambraces |
0 |
0 |
0 |
-10 |
+11 |
+6 |
+5 |
+7 |
+8 |
0 |
A snappy addition to dragon leather armour is available from the Fist of Guthix minigame. For a certain amount of points, you can purchase coloured coifs that match basic dragonhide armour. These coifs will deteriorate over time (like Barrows items), but Reggie will restore them for some tokens. Each piece requires level 40 defence, and the range requirements match those for the dragonhide armour (40, 50, 60, 70). The green coif is superb for F2P, and all of them are better than the plain leather coif. The black coif is the only one that approaches a blessed coif's +7 range bonus, and surpasses the archer helm's +6. They pass the robin hood hat's defence stats but not its +8 range attack.
| Stab |
Slash |
Crush |
Magic |
Range |
Stab |
Slash |
Crush |
Magic |
Range |
Summon |
 |
Green Dragonhide Coif |
0 |
0 |
0 |
-1 |
+4 |
+4 |
+6 |
+8 |
+4 |
+5 |
+4 |
 |
Blue Dragonhide Coif |
0 |
0 |
0 |
-1 |
+5 |
+4 |
+6 |
+8 |
+4 |
+6 |
+5 |
 |
Red Dragonhide Coif |
0 |
0 |
0 |
-1 |
+6 |
+4 |
+6 |
+9 |
+4 |
+6 |
+6 |
 |
Black Dragonhide Coif |
0 |
0 |
0 |
-1 |
+7 |
+4 |
+7 |
+9 |
+4 |
+7 |
+7 |
If you are very lucky while working through Treasure Trails, you may chance upon some Blessed Dragonhide Armour. There are three full sets of this armour, each styled after one of the three main RuneScapian Gods. Each piece requires level 70 ranged and level 40 defence. These fancy dragonhide armours have the exact same bonuses as Black Dragonhide Armour, but are more colourful.
 |
Blessed Coif |
0 |
0 |
0 |
-1 |
+7 |
+4 |
+7 |
+10 |
+4 |
+8 |
 |
 |
Blessed Body |
0 |
0 |
0 |
-15 |
+30 |
+55 |
+47 |
+60 |
+50 |
+55 |
 |
Blessed Legs |
0 |
0 |
0 |
-10 |
+17 |
+31 |
+25 |
+33 |
+28 |
+31 |
 |
Blessed Vambraces |
0 |
0 |
0 |
-10 |
+11 |
+6 |
+5 |
+7 |
+8 |
0 |
If you are exceptionally lucky while questing after Treasure Trails, you may find yourself with the extremely rare 3rd Age Ranged Armour! This armour is known not only for its rarity, but also for its high bonuses.
 |
Third Age Range Coif |
0 |
0 |
0 |
-2 |
+9 |
+4 |
+7 |
+10 |
+5 |
+8 |
 |
Third Age Range Top |
0 |
0 |
0 |
-15 |
+30 |
+55 |
+47 |
+60 |
+60 |
+55 |
 |
Third Age Range Legs |
0 |
0 |
0 |
-10 |
+17 |
+31 |
+25 |
+33 |
+30 |
+31 |
 |
Third Age Range Vambraces |
0 |
0 |
0 |
-10 |
+11 |
+6 |
+5 |
+7 |
+9 |
0 |
If you are brave enough to challenge the forces of Armadyl within the God Wars Dungeon, you may be lucky enough to acquire these pieces of Armadyl armour. These pieces of armour are currently some the strongest range armour pieces in the game (of course they can be purchased from players who own them as well). These items will only be dropped by the four Armadyl bosses within the Armadyl Eyrie.
 |
Armadyl Helmet |
-5 |
-5 |
-5 |
-5 |
+10 |
+6 |
+8 |
+10 |
+10 |
+8 |
0 |
1 |
 |
Armadyl Chestplate |
-7 |
-7 |
-7 |
-15 |
+33 |
+56 |
+48 |
+61 |
+70 |
+57 |
0 |
1 |
 |
Armadyl Legs |
-6 |
-6 |
-6 |
-10 |
+20 |
+32 |
+26 |
+34 |
+40 |
+33 |
0 |
1 |
If you are lucky enough in the Forinthry Dungeon, you may receive a piece of Morrigan's ancient equipment as a drop. These items come in two types; one with level 78 requirements in relevant skills, and one with level 20 requirements. The regular set will last an hour before degrading, while the corrupt type with lower requirements will last only 15 minutes of use.
Certain jewellery offer bonuses to ranged attack among other stat boosts. These can be obtained through quests, the Crafting skill, and as monster drops.
There are a number of special equipment throughout the game, generally accessible only upon the completion of certain quests, or completion of clues. These are usually more expensive as they are harder to obtain, but offer good advantages to members who use them.
 |
Archer Helmet |
Once you have completed the Fremennik Trials quest, you can purchase this helmet (amongst others) from Skulgrimmen's Battle Gear (located north of the Fremennik general hall) for 78,000 gp. It provides a +6 ranged bonus when worn and it requires level 45 defence to wear. |
 |
Robin Hood Hat |
These can be obtained as possible rewards for completing level 3 clues. They provide a +8 ranged attack bonus when worn. See our Treasure Trail guide for more information. |
 |
Ranger Boots |
These can be obtained as possible rewards for completing level 2 clues. They provide a +8 ranged attack bonus when worn . See our Treasure Trail guide for more information. |
 |
Glaiven Boots |
These can be obtained by killing level 475 Glacors. They can be killed after completing the Ritual of the Mahjarrat. |
Other Equipment
Yet another ranging equipment option is Karil the Tainted's set obtained from the Barrows minigame. The armour requires 70 defence and 70 range, and the weapon requires 70 range to be used. The weapon can only fire bolt racks, which can be also obtained from the Barrows minigame or purchased from Ak Haranu in Port Phasmatys. When the set is complete, damaging ranged attacks have a chance of reducing the target's agility by 20%.
 |
Karil's Coif |
0 |
0 |
0 |
-1 |
+3 |
+6 |
+9 |
+12 |
+6 |
+10 |
0 |
0 |
 |
Karil's Leathertop |
0 |
0 |
0 |
-15 |
+30 |
+47 |
+42 |
+50 |
+65 |
+57 |
0 |
0 |
 |
Karil's Leatherskirt |
0 |
0 |
0 |
-10 |
+17 |
+26 |
+20 |
+28 |
+35 |
+33 |
0 |
0 |
 |
Karil's Crossbow |
0 |
0 |
0 |
0 |
+84 |
0 |
0 |
0 |
0 |
0 |
0 |
0 |
| Total: |
0 |
0 |
0 |
-26 |
+134 |
+79 |
+71 |
+90 |
+106 |
+100 |
0 |
0 |
The Animal Magnetism quest rewards players with an Attractor or Accumulator. When worn in the cape slot, it picks up around 75% of your dropped arrows and deposits them into your arrow slot or pack. Any obstacle between you and the arrows will block this ability. The device also creates metal items (usually arrows, but also ores, bars and various others) from thin air. Walking around gets more arrows than standing still. The Attractor creates iron items and requires range skill level 30; the Accumulator (upgrading requires 75 steel arrows) creates steel items and requires range level 50. These devices also give a range bonus!
After the Do No Evil quest, the Accumulator can be further upgraded to Ava's Alerter, which provides slightly higher stat bonuses.
Note: These devices will only function on members' worlds.
Attractor
 |
Style |
Stab |
Slash |
Crush |
Magic |
Range |
Strength: +0
Prayer: +0 |
| Attack |
+0 |
+0 |
+0 |
+0 |
+2 |
| Defence |
+0 |
+0 |
+0 |
+2 |
+0 |
Accumulator
 |
Style |
Stab |
Slash |
Crush |
Magic |
Range |
Strength: +0
Prayer: +0 |
| Attack |
+0 |
+0 |
+0 |
+0 |
+4 |
| Defence |
+0 |
+1 |
+0 |
+4 |
+0 |
Alerter
 |
Style |
Stab |
Slash |
Crush |
Magic |
Range |
Strength: +0
Prayer: +0 |
| Attack |
+0 |
+0 |
+0 |
+0 |
+5 |
| Defence |
+0 |
+1 |
+0 |
+5 |
+0 |
Void Knight Armour is received as a reward from playing the Pest Control minigame. It increases your ranged accuracy and damage by approximately 20%. Void knight armour requires level 42 Attack, Strength, Defence, Constitution, Ranged, Magic, and level 22 Prayer to wear.
 |
Void Helm |
0 |
0 |
0 |
0 |
0 |
6 |
6 |
6 |
6 |
6 |
0 |
0 |
 |
Void Knight Top |
0 |
0 |
0 |
0 |
0 |
+45 |
+45 |
+45 |
+45 |
+45 |
0 |
0 |
 |
Void Robe |
0 |
0 |
0 |
0 |
0 |
+30 |
+30 |
+30 |
+30 |
+30 |
0 |
0 |
 |
Void Knight Gloves |
0 |
0 |
0 |
0 |
0 |
+4 |
+4 |
+4 |
+4 |
+4 |
0 |
0 |
The Stealing Creation minigame has some special Ranged equipment available as a reward. For a while, you will receive double the normal combat experience while wearing this armour. This armour will degrade based on the amount of extra experience you gain by using it. Once it has run out of extra experience, it will continue to function, but cannot transform or give you extra experience. A set is the sum of its parts, so each item has a set amount of possible experience gained by use, rather than the set as a whole.
Prayer books (of the Zamorak, Guthix, and Armadyl variety) are the only shields that give a ranged attack bonus. The blank books are first gained from the Horror of the Deep Quest, then pages are gained from Treasure Trails. Add these pages to your book. Once completed, the books will gain stats. There are four different pages for each book, numbered in order. Please visit the Prayer Guide to learn more about these books.
Crystal Bow (members only)
A New crystal bow can be bought for 900,000gp after completing the Roving Elves quest. To do this quest you must have also done these quests: Waterfall, Plague City, Biohazard, Underground Pass, Regicide.
This bow requires level 70 Ranged and level 50 Agility to wield and doesn't use any ammo. It initially has 2500 uses and when these run out you will have to recharge it. It runs out slowly and this is shown by a rating out of 10. For example it starts out full with 10/10 and then slowly drains to 1/10 and then finishes after you have exhausted 2500 shots. Just right click on the weapon to see which stage you are at. The ranged attack bonus of the bow decreases as you use it as shown below.
| 10/10 |
+100 |
| 9/10 |
+96 |
| 8/10 |
+92 |
| 7/10 |
+88 |
| 6/10 |
+84 |
| 5/10 |
+80 |
| 4/10 |
+76 |
| 3/10 |
+72 |
| 2/10 |
+68 |
| 1/10 |
+64 |
After the first 2500 uses, you will need to recharge your bow to get another 2500 uses. To do this, you will have to pay a roving elf (Ilfeen) in the forests of Isafdar a certain price. The first recharge is expensive, but they get cheaper every time you use the bow up. The price eventually stabilises. Should you lose your bow, you can either buy a replacement from Islwyn for the full price, or you can buy an uncharged crystal seed from other players. Crystal seeds bought from other players can be recharged at the price you had already achieved with your old crystal bow.
| First |
900,000gp |
| Second |
720,000gp |
| Third |
540,000gp |
| Fourth |
360,000gp |
| Fifth and onwards |
180,000gp |
Once you have reached the fifth recharge, the bow becomes viable in terms of using it for training. With the power to hit higher than Rune arrows, 80% of its 2500 uses are more accurate than Magic bows. However, it will cost just over 2.5 million gp to get to the fifth recharge so choose wisely. If you lose your bow you will need to pay the full 900k to replace it or more simply just buy a crystal seed from another player and get that seed recharged.
NOTE: The fully recharged crystal bow (Crystal bow full) and the degraded crystal bows are untradable. Only the New crystal bow and a completely degraded bow (Crystal seed) are tradable.
Skill Boosts (Members only)
There are several Summoning familiars available to assist rangers. In addition to the familiars that give you ranging experience as they fight (for a full list, see our Summoning Guide), there are some familiars with unique and interesting abilities, including boosting your Ranged level!
| 19 |
 |
Spirit Scorpion |
Fights (level 51) Controlled |
Venom Shot: Makes your next ranged attack mildly poisonous if using poisonable ammo |
| 66 |
 |
Barker Toad |
Fights (level 112) Strength
Right-click "Cannon" (must be loaded with cannonball) |
Toad Bark: Deals up to 180 damage on opponent |
| 89 |
 |
Geyser Titan |
Fights (level 200) Ranged
Boosts Ranged (1 + 3%)
Fills empty bowl with hot water (use on it)
Recharge Amulet of glory (use on it) |
Boil: Attack that does more damage based on enemy player's armour |
Alternative boosts are also available. For instance, the Herblore and Cooking skills offer some items.
 |
Ranger's Aid |
+2 |
Can be purchased at the Poison Arrow Pub near Ardougne's dock. Also heals 10 LP, but reduces defence. |
 |
Ranger's Aid (m) |
+3 |
Can be purchased at the Poison Arrow Pub near Ardougne's dock. Also heals 10 LP, but reduces defence. |
 |
Ranging potion |
4-13 |
Made at 72 Herblore by combining Dwarf weed and Wine of Zamorak, or purchased from other players. |
 |
Extreme Ranging |
4-23 |
Made by adding 5 Grenwall spikes to a Ranging Potion(3). MUST have at least level 92 Herblore to make or use, as this potion is untradeable and cannot be assisted. |
 |
Overload |
4-23 |
Made by mixing Extreme attack, Extreme strength, Extreme defence, Extreme magic, and Extreme ranging with a Torstol herb. MUST have at least level 96 Herblore to make or use, as this potion is untradeable and cannot be assisted. The boost from this potion does not slowly "wear off"; instead it last for a full five minutes before your stats are reset to normal. When this potion is drunk, you will lose 500 life points in sets of 100. These life points are restored when the potion wears off. |
 |
Spicy stew |
-6 to +6
(random) |
Can be made by the player using Red spice while making a Spicy stew. |
 |
Focus sight |
Slayer task only |
Gives a continuing ranged skill boost when worn as a helm during slayer tasks. The effect is similar to a black mask. The focus sight is dropped by Desert Strykewyrms. |
Special Attacks (members only)
Certain range weapons have special attacks that will hit your enemy with an added affect that will be to your advantage. To perform a special attack, you must check to see if the special attack power bar is full enough. You can see this in the weapon menu.
It is worth noting that only certain weapons have special attacks, not every weapon. The table below shows the different special attacks for ranged weapons and information about how they work. Every time you use a special attack, it will drain some of your special energy power as shown on the bar. This automatically regenerates by itself and there is nothing you can do to make it go faster.
Training Spots
There are many locations over the world where you can train your ranged level. You have to experiment with different equipment in different training spots to see what is best for you. To help you, the tables below show different training spots for free players as well as members. Please note that the Stronghold of Security is also a good training area for rangers, as it provides many safespots and some of the monsters inside drop arrows.
| Rats in Varrock Sewer |
1-20 |
A good and safe place to start ranging. |
|
| Goblins in Goblin Village |
1-20 |
Good to start ranging, plenty of goblin spawns all around. |
|
| Chickens in Lumbridge |
1-20 |
You can range them from outside the pen, then pick up your arrows as well as their feathers. They are ideal to start getting your first ranged xp. |
|
| Cows in Lumbridge and the Crafting Guild |
1-20 |
You can range them from outside the pen. Then go in to pick up your arrows, and cook the beef if you like. Crafters will also buy the hides. |
Their defence can be a stumbling block if your ranged level is very low. |
| Minoutars in the first level of the Stronghold of Security |
1-30 |
Minoutars drop iron arrows. Also, they can be safe-spotted through a fence. |
|
| Various NPCs in Port Sarim Jail |
1-30 |
Thugs, goblins and thieves can be killed. Once you have a higher level you can get the black knight too. |
You can't pick up your arrows as the NPCs are caged. |
| Barbarians in Barbarian Village |
20-40 |
You can use the tables in the village main hall as cover. And you can pick up free meat and Beer. |
They will throw axes back at you in retaliation. |
| Dark Wizards in lvl 9 wilderness |
20-40 |
There are plenty of them respawning and many things you can use as cover. Your ranged armour will give good defence against their magic attacks. |
You risk being attacked by Player-killerss. |
| Edgeville Guards |
40-60 |
Range the guards north of Edgeville bank using the Wilderness Wall as a safety obstacle. Alternatively, you could range the skeletons in the low level Wilderness. |
Often busy at peak times so there might be other people here. |
| Hobgoblins near the Crafting Guild |
50-70 |
Just south west of the guild there are some goblins on a piece of land jutting out. You can range them from the guild across the water and not pick up arrows, or on the other side and pick up your arrows. |
You will lose arrows if you range across the water. And often there might be people melee fighting them. |
| Black Knights in their fortress |
60-99 |
You can use the tables on the ground floor as cover to range across. Then pick up your arrows afterwards. |
You will need to be wearing a bronze med helmet and iron chain mail to enter. |
| Lesser Demons in Karamja Volcano |
60-99 |
In the south-most part of the dungeon, there are plenty of ways you can use the landscape as cover to range the Lessers. |
It's a relatively long journey to get to the island of Karamja initially. But then you can stay as long as your arrows last, as you can keep picking them up. |
| Low lvl NPCs in Ardougne Zoo |
1-30 |
Many animals are caged in the zoo, so take your choice. |
You have to walk around the zoo and you can't pick up your arrows. |
| Gnomes in the Khazard Battlefield |
1-30 |
Lots around to train on so you should get fast xp when you are starting to range. You can pick up you arrows as well. |
They are spread out so you have to walk around a bit. |
| Higher lvl NPCs in Ardougne Zoo |
30-50 |
Many animals are caged in the zoo, so take your choice. |
You have to walk around the zoo and you can't pick up your arrows. |
| Mt Dwarfs under White Wolf Mountain |
40-60 |
Lots of dwarves reside here and plenty of tables to seek cover behind. They drop a decent amount of runes too. |
|
| Druids in Taverly |
40-60 |
Several Druids can be found wandering around the city and the Druid circle. Lots of things to use as cover. |
They tend to be a bit spread out. |
| Ogres in Chaos Druid Tower |
50-70 |
You can avoid taking any damage by using the rocks and bones as cover. Many spawns available. Also receive good prayer xp from big bones. |
You will need lvl 46 thieving to picklock the door to enter this tower. The Ogres can be found by going down the ladder. |
| Green Dragons in lvl 38 wilderness |
50-80 |
They drop dragon bones which is good for prayer exp, and their hides can be used for crafting. They also drop clues. |
Watch our for their breath, and keep an eye out for Player-killers as well. |
| Caged Ogres in King Lathas Training Camp |
60-99 |
Very good xp as they are always in this cage and you can go inside to recover your arrows. They can also be maged or meleed with a hally. |
You have to complete the Biohazard quest to access this training camp. If you leave your arrows inside too long, other players usually take them. |
| Fire Giants in the Waterfall dungeon |
60-99 |
Very good xp as they have low defence and are plenty in number. You can also recover your arrows and they give relatively good drops. |
Must do parts of the Waterfall quest to get Glarial's amulet (required to enter). Often crowded at peak times. |
| Fire Giants in their wilderness lair |
60-99 |
Good xp and drops, and this spot is often empty because of its location. |
This is deep in the wilderness so you risk attack by Player-killers. |
| Aviansies in the God Wars Dungeon |
70-99 |
A combination of good xp and drops. They drop a large number of adamant bars. |
They require prayer to kill. |
| Black Demons in Members dungeon |
70-99 |
Quite a few areas to take cover behind, and many Demons to choose from. |
Will get crowded in peak times. |
| Black Demons in Edgeville Dungeon |
70-99 |
Four areas to take cover behind, and fast xp if you can keep killing one before the next spawns. |
In the wilderness section of the dungeon, this area is known to be frequented by Player-killers. |
| Greater Demons in the Ogre Enclave |
70-99 |
There are four spawns behind the cage you can shoot at. Good xp, even if there is another player. They can drop clues and rune full helms so don't forget those telegrab runes. |
They are caged so you can't recover your arrows. Bring an anti-dragonfire shield since you may walk past blue dragons. You need to have started the Watchtower quest to access this area. |
| Greater Demons on Entrana Island |
70-99 |
Good xp and drops. There are areas to take cover too. |
As you cannot bring armour or weapons onto the island, you will have to fletch your bow and arrows and craft your armour from raw materials once you get there. This means you will need the necessary levels. Also, often crowded. |
| Blue Dragons in Members Dungeon |
70-99 |
They drop dragon bones which is good for prayer exp, and their hides can be used for crafting or sold for a good profit. They also drop clues. |
Usually gets crowded during peak times and be careful to position yourself not to get burnt by their Dragon breath. |
In addition, participating in the ranged minigame at Balthazar Beauregard's Big Top Bonanza can earn you plenty of Ranged XP. Please see our Circus Guide for more information.
Cannon
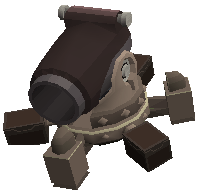
The cannon is definitely the most interesting ranged weapon. You can buy it for 750,000 gp after completing the Dwarf Cannon Quest, but it is much cheaper to purchase it on the Grand Exchange or from another player. Either way you will be still entitled to a replacement cannon if it breaks. It hits the most damage compared to other ranged weapons. It consists of four pieces which you have to set up and weighs quite a bit (around 30kg). You can have multiple pieces in your bank, but you can only have one cannon set-up at a time.
To setup your cannon simply left click on the base and it will automatically put it together for you. Be sure to setup your cannon on an area of 3x3 squares. You can either buy your cannonballs from other players, or you can make your own which will be slightly cheaper. To make your cannonballs make sure you have a cannonball mould in your inventory (only available from the dwarf engineer), then simply use a steel bar with a furnace. You will receive four cannonballs for every steel bar, and 25.6 smithing xp per bar.
To start using your cannon just simply click on your cannon and it will load and fire automatically. It will start rotating and shooting off each ball at any enemy it detects. To reload just simply left click on the cannon again. If you pick up your cannon before it has used all 30 balls, you will get your ammunition back. Remember though, the cannon cannot be used against other players. |
|
However, after approximately 20 minutes, your cannon will decay. It is possible to avoid having your cannon decay; before it happens a message will appear in your chat box warning you that your cannon has nearly decayed and the cannon will show an odd animation. When that message appears simply pick up the cannon and then set it back up, this will stop the cannon decaying for approximately another 400 shots. If your cannon does decay all you have to do is go back to the Dwarf engineer for a replacement. As long as you set it up - it doesn't matter who you bought the cannon from - you can get a replacement. If you lost your cannon, say by setting it up and logging out, you can also get a replacement, but not if you dropped parts or died carrying them.
Despite this, the cannon is often used to speed up through slayer assignments (by killing monsters outside these locations). When using a cannon, you will not receive constitution experience and the range experience obtained from it is only 1/2 of the experience obtained using regular ranging weapons. An intensive study has shown that the cannon's accuracy is affected by your stats and levels, but in a peculiar way. Not your ranged level or attack bonus matters, but the level and bonus that apply to the style you are currently using. For example, when using an abyssal whip, the cannon will use your attack level including prayer boost and your slash attack bonus.
A list of some good training spots (multi-combat areas, of course) using this weapon is provided below:
- Towards the end of the Ice Maze in White Wolf Mountain.
- Poison Spiders around level 35 wilderness.
- Ogre cage in King Lathas Training Camp just north of Ardougne.
- Dagannoths at the Lighthouse in North Kandarin (after completing the Horror from the Deep quest).
- North of the Lunar Island (accessible after doing a part of Lunar Diplomacy quest), where there are several level 111 Suqahs.
Have fun killing with this truly awesome weapon of mass destruction.
Combat Triangle
Jagex has created a "combat triangle", wherein every class has a advantage over another, whilst having a disadvantage against the third. You can read more about it in our Combat Triangle guide. This combat triangle is essential to combat in Runescape.
Damage Table
For your reference, we have composed a table showing the maximum damage you can inflict with each type of arrow at every different level. Click Here to launch it as a pop-up. Please note that the damage indicated by this table is not 100% accurate and that occasional +1/-1 hits are possible.
Our Crossbow Damage Table shows the maximum damage you can inflict with each type of bolt at each level. Again, please note that the damage indicated by this table is not 100% accurate and that occasional +1/-1 hits are possible. So get your bow and arrows ready, and go enjoy some ranging.
Cape of Achievement
Once you have mastered the skill and reached level 99 you may want to buy yourself a Ranged Cape from the armour salesman in the Ranging Guild. Refer to the Achievement Capes guide for more details.


